I'm lovin' it!
Showing posts with label DIY. Show all posts
Wednesday, January 25, 2012
Floating Art Project
I've been itching to frame out a piece of art with a simple, acrylic frame. It's such a clean aesthetic that can really showcase artwork in a modern way. Jenny posted not too long ago about finding acrylic frames for smaller works, but I was thinking something on a larger scale...
We gifted my sister and BIL an original painting from Brazil, and while we were visiting them, it gave me the perfect chance to test the acrylic-framing waters.
I took the artwork to a local glass and mirror shop, and asked if they could cut two pieces of acrylic to "sandwich" the artwork between. *Note* I anticipated "Whatchoo talkin' 'bout, Willis?" looks, so I took the above inspiration photo for explanation purposes. ;)
I had them cut 1/4" (rather than 1/8") pieces for a more substantial look, and drill holes at each corner. Since I wanted a floating look, I had them size the sheets to allow about a two-inch border around the painting.
To hang the painting, I had to enlist Ben's help (of course!). He had to enlarge the drill holes a bit to allow for the brass screws we selected to hang the art.
If you try this, be slooooow and careful, so you don't crack the acrylic!
Next, we cleaned the acrylic of all fingerprints. He had a little "help." Note to self: next time, use latex gloves!
We used double-sided tape on the back of the painting to make sure it wouldn't slip during the hanging process.
We secured it all with brass screws through the drilled holes - straight into the wall (using drywall anchors). ......aaaaand DONE!
I'm lovin' it!
Tuesday, December 13, 2011
My DIY Agate Lamps
I'm dipping my toe back into the blogging waters with this little project I've been wanting to share for some time. I'm sure I'm not alone in obsessing over the gorgeous lamps we've all seen made of semi-precious stone, agates and geodes. Bad News: those things are crazy expensive. Good News: The area of Brazil where we live is geode mecca - where dozens of quarries and mines are found.
I found some lamp-making kits through this seller on Ebay, knowing that with some awesome rocks, I could make my own glamazon lamps. On our last day trip to a little mining town, I snagged two, large (about 5 lbs each) amethysts for a really reasonable price.
I gilded the base of the rock with paint, and painted the lamp base red per Ben's suggestion. I had planned to go boring-black on the base, but am so glad I went with my hubster's opinion, as I love how the purple-red-gold color combo amps up the glam factor. Dontcha hate it when spouse's are right? ;)
As you can see, the rock sits in front of the lamp pole, which isn't quite the perfect-professional look I'd like to have, but it makes for a very simple project, and overall, gives the look I was going for. The lampshade still needs a little zhushing, too.
Yes, my bedside table needs some serious styling help, but you get the idea. A+ for effort, right?
Monday, November 7, 2011
Bent on Burl Wood
Did you know burl wood is an abnormal growth found on a tree that has typically experienced some sort of stress - like insect or fungal infestation? Rather nice material for being an unwanted arboreal house guest, wouldn't you say?
I've been eyeing this particular desk/vanity/console made of burl wood and lucite for some time.
Source: myinteriorlife.blogspot.com via Alison on PinterestO
Contact Paper via Ebay (could work, or could be very, very B.A.D.)

Veneer sheets via Ebay - Gets the award for best looking, but also requires more of an investment...oh, and serious application skilz.
I'm sounding crazy, but the call of the Burl is getting stronger!
Monday, August 8, 2011
DIY Gemstone Finials - kinda of a duh...
I've been keen on the design world's general fascination with all things geode and agate over the recent past. It just so happens the vast majority of these goodies are mined right here in Brazil. This weekend, we took a road trip to the gemstone mecca where we waded through piles and piles of all things lapidary.
Gorgeous, amethyst formations
The mother lode of rough-hewn rose quartz
Famous birds of Brazil carved from semi-precious stone
I've been wanting to work some of the "positive-energy" pieces into a project, but figured I'd start off small...
...and picked out a few choice crystals from the piles (Sure you could unearth similar finds on Ebay as well)
...a little hot-glue gun action to stabilize everything
...and my lamps got a little facelift. (I can feel the energy, already! ;)
...Into one of these....
Source: apartmenttherapy.com via Alison on Pinterest
Monday, February 21, 2011
Weekend Project: Interesting Art (3D style!)
I'm forever searching for interesting art to fill our many, white walls. Unfortunately, although I have no formal training in art, it never seems to fail that my eye falls to the priciest pieces. Not good.
So, I was delighted to see one of my favorite local artisans, a basket weaver, has expanded his repertoire to include many brightly colored versions of his traditional, woven wares . He weaves baskets from Taboa, an aquatic, grassy plant, similar to our cattails. I was instantly smitten with all the new shades, and picked out an assortment, envisioning them in a grouping somewhere in our casa.
I initially thought they'd be best in a grouping, but Ben suggested a more linear placement, as we have a large, long wall in our entry. I couldn't argue with his idea, so I set him to work on the install.
Nevertheless, the arrangement turned out great, with a very gallery-like appearance. The limitation of my photo doesn't nearly depict how cool it looks.
So, my 3-prong tip of the day for art is:
- As much as possible, stay original
- Think beyond the canvas, and
- (sometimes) Listen to your Better Half. ;)
Sunday, January 23, 2011
Would you ever?
...have the patience to do this...
LeAnn did. She lives in Austin, so, she's de facto cool. And talented. Really, ruuullly talented. ...and patient, apparently.Wednesday, January 12, 2011
I can do THAT
This morning, at the One Kings Lane Tastemakers Sale, I noted that this Blue Lacquered Armoire by designer Chloe Redmond Warner sold for just under four THOUSAND clams.
Seriously.
Seriously.
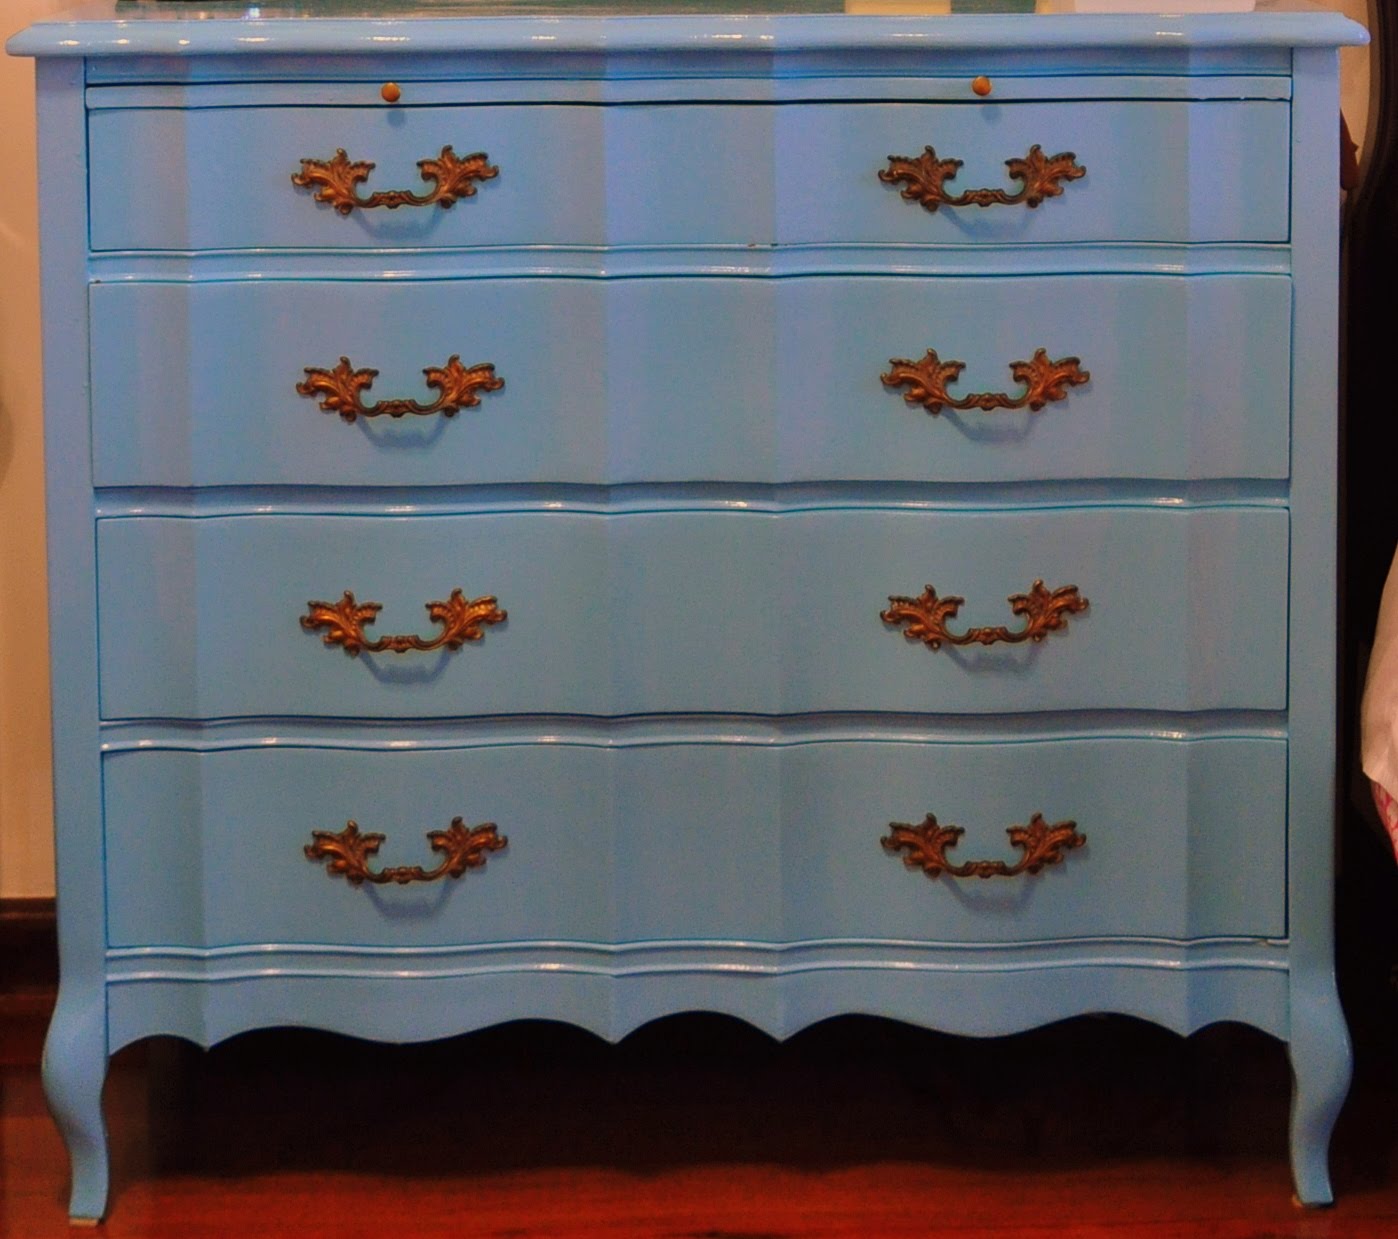
It seems to have a lot in common with my own, turq-WAZ lacquered bureau - which, by the way, is an inexpensive hand-me-down that I refinished in all its glossy glory. It's still one of my fave DIY projects - perhaps I should submit it to Eddie?Friday, November 5, 2010
On Second Thought...
I decided I need to move on that idea of taking some gold paint to something 'round our casa... We received these lamps as wedding gifts. They aren't anything I would purchase on my own, and they aren't exactly high-end, either.
Howevah I did redeem myself a bit with an attempt to duplicate these gorgeous Eduardo Garza bookends.
Those babies are dumb expensive. Who knew you could redeem your credit by selling your bookends? Anyway, awhile back, the Matters of Style gals held an impromptu gilding session, and I took note: Wednesday, August 4, 2010
Details Geek Needs Help!
Two things going on at Casa Giese: Isla's nursery and the "office/playroom"
First: I had a burst of get-it-done energy last weekend, and tackled Avery's old changing table with a new coat of paint. It's a small, vintage sideboard we picked up in Virginia for $25 before Avery was born. It serves perfectly as a changing table. I was ready to see the shabby look go, though, so it got a coat of gray paint.
Before: Sanded-down white with glass knob hardware
First: I had a burst of get-it-done energy last weekend, and tackled Avery's old changing table with a new coat of paint. It's a small, vintage sideboard we picked up in Virginia for $25 before Avery was born. It serves perfectly as a changing table. I was ready to see the shabby look go, though, so it got a coat of gray paint.
Before: Sanded-down white with glass knob hardware
Partial After: Light-ish gray
I intend to change the hardware, but have hit a stumbling block - and this is where I need your help....
If I go with ring pulls, similar to these on the drawer:
What do I use for the cabinet doors, where the the same ring pulls won't fit? Egg knobs in the same finish?
Round knobs?Also, I was thinking of keeping the "canvas" of the room very neutral in all grays - gray walls, gray changing table, and a gray and cream ikat on the glider (waiting to be reupholstered) and then letting colorful art take center stage, but it that TOO much gray?
Should I repaint the changing table black, or at least a very deep, charcoal gray, to add some more contrast? (Think that polished brass hardware = yum!) Yes, I'm noting the difference in hues between the fabric and paint...yet another dilemma...
I think in my haste, I'm not really thinking the design through, and need some guidance - so dear gurus of style.... Lead me!
*I'll let you chew on this for a day or so, then I'll follow up on the office/playroom situation soon!
I think in my haste, I'm not really thinking the design through, and need some guidance - so dear gurus of style.... Lead me!
*I'll let you chew on this for a day or so, then I'll follow up on the office/playroom situation soon!
Posted by alison giese Interiors at 9:40 AM 14 comments
Labels: Casa Giese, DIY, Furniture, Hardware, Nursery Ideas, Paint, Projects
Subscribe to:
Posts (Atom)